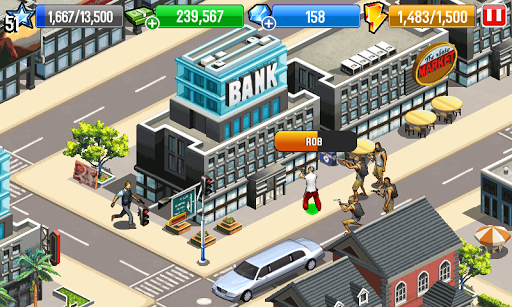
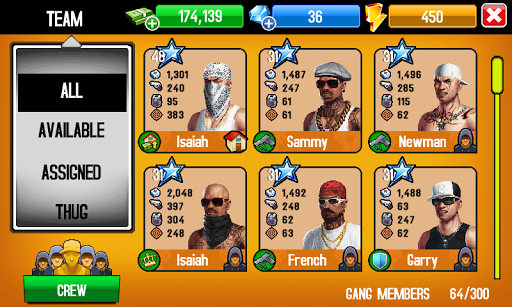
Your brother has been kidnapped and now you have to take out every thug
that stands between you and him. Run your own district: Collect money
from shops, throw giant house parties, attract gangsters, and guard your
crib. Whip out every dirty trick and deadly weapon in your arsenal to
take on tons of jobs and make a name for yourself in the L.A.
underground. Rob banks, fight police, kidnap enemies and more. Expand
your domination over 4 different districts, from sunny Santa Monica to
the famous streets of Hollywood. In Gangstar City, you'll become the
king of L.A. or die trying!
How to create an Apple ID without a credit card?? Ok it is simple here.
1. Click iTunes Store (on the left side of the iTunes window), and pick your
country by clicking the appropriate country flag located in the bottom-right
corner of the main iTunes Store page.
2. Navigate to the App Store by clicking on App Store from the top
navigation bar.
3. Important: Before proceeding to the next step, you must download and
install a free application. To find a free application, navigate to the Top
Charts column on the right side of the App Store window. Scroll down until you
see the list of Free Apps. Select any application by clicking on it. Then,
click Free App underneath the application icon.
4. In the pop-up window, click Create Apple ID.
5. You are directed to the "Welcome to the iTunes Store" screen.
Click Continue.
6. You'll need to read and agree to the iTunes Store Terms & Conditions.
Make sure you select the checkbox next to "I have read and agree to these
terms and conditions."
7. Click Continue.
8. Enter your email address, create your password, continue to create and
answer your security questions, and then enter your birthday.
9. You can also enter an optional rescue email address. If you frequently
change email addresses, this is recommended.
10. Once you are satisfied with the information entered, click
Continue.
11. Select None as the payment type.
12. Continue to fill out the required name and address fields.
13. You'll then see a "Verify your Account" screen. Click Done,
and then check your email for a verification email from iTunes Store.
14. Open the email, and click the link enclosed in the email to activate your
account.
15. Once you click on the link, the Apple ID website should ask you to sign
in with your account name and password.
16. After signing in, you should see that your email address is associated
with your Apple ID. A button labeled "Return to the Store" should
appear.
17. Once you sign in, you'll then see the below "Congratulations"
screen. Click Start Shopping to be taken to the App Store home page.
Everyone makes PowerPoint presentations these days. Want to make yours stand
out? Here's how.
1. Choose images - big, clear, relevant. Don't put an image
in as filler. Use a blank slide with one word on it rather than using an
irrelevant or distracting picture.
2. Write speaker's notes as you go along and amend them
every time you practice the presentation or if something new occurs to you.
3. When you think you have it down, time yourself.
4. Say "So What?" to yourself a whole lot when you
are practicing. If you can't answer the "So What?" drop the slide or
the word or the point
5. During the end of the presentation, if you have allotted
time left, include moving pictures (clips) and social cuttings as a closure, or
you may include your proposal of the final required result as a curtain downer,
and then ask for opinions in a positive way.
6. Slides are a helper in your presentation not the core.you
will need to prepare the topic before hand and explain the questions that
viewers ask.
7. For this you may either adopt the strategy of letting
people ask their doubts/likes with each slide or tell them before hand that you
will answer all the questions once you have made your point.
8. Prepare the content with the audience in mind as well as
yourself.A corporate PowerPoint Presentation (PPT) on financial review will
look a lot different than one on a scientific project or a nature oriented
one.also you yourself must relate with the topic to do justice to it.
9. Avoid asking, "Do you have doubts?" or
"What do you think about it?" These may trigger the negative
associations in the audience. Ask only if you are proficient in the subject and
know thoroughly with conviction about what you have just presented. If you are
new, try asking, "How would you like to implement it with additions?"
or "What more would you like to see added into it?" You can also try,
"What difference can it make to help in our growth and why should we
promote it?"
10. If you are experienced and know already that you have
done a good job with the PPT with full conviction, DO NOT ASK and DO NOT MAKE
ANY FURTHER COMMENTS once it's over. Let your audience decide and wait for it.
It's worth the effort to let them come out clapping or with their own comments
without your nudging.
11. During the very beginning of the PPT, you may give a
brief outline or a flow chart about the basic topics you wish to cover. This
will help in two ways:
12. First: The audience will be ready to capture the flow of
PPT.
13. Second: An uninterested audience will either leave or
will come to know about them as you deliver your content. This will help you in
cutting short answers to those whom you may understand are not paying attention
but just asking questions for the sake of it and move to those with interest.
14. If your finances permit,give them a text copy of the
major points before you begin. This is not only a good practice but also helps
them to review slides they may have missed.
An Internet Protocol
address (IP address) is a numerical way of identifying your computer on a
network. Every computer in your home or office has its own unique number that
is dynamically generated, but that doesn't mean you can't change the number
currently assigned to your machine. If you connect to the Internet with DHCP
(Dynamic Host Configuration Protocol), you can change your IP address in a
snap.




 How to create an Apple ID without a credit card?? Ok it is simple here.