Berita Terbaru :

Saturday, 8 June 2013

Sejarah Google

Sejarah Google
Sepertinya setiap orang yang menggunakan internet pernah menggunakan produk Google. Perusahaan multinasional yang berpusat di Amerika Serikat ini memang telah meluncurkan berbagai produk. Namun, pernahkah Anda berpikir seperti apa sejarah Google? Bagaimana nama Google bisa ditemukan? Bagaimana pula perkembangan perusahaan tersebut hingga dapat sesukses sekarang ini?

Google atau Googol?

Sejarah Google berasal dari proyek mesin pencari bernama BackRub yang dikembangkan pada tahun 1996 oleh Larry Page dan Sergey Brin, mahasiswa pascasarjana ilmu komputer Stanford. Proyek ini beroperasi dengan menggunakan server kampus mereka  selama lebih dari satu tahun.
Setahun kemudian, pada tahun 1997, akhirnya nama Google pun digunakan untuk mengganti nama BackRub. Namun, tahukah Anda bahwa sebenarnya kedua pendirinya memberi nama Googol, bukan Google? Bagaimana sejarah nama Google sehingga nama Googol bisa berubah?
Googol merupakan istilah di bidang matematika untuk bilangan yang direpresentasikan dengan angka 1 dan diikuti dengan seratus angka nol. Filosofinya adalah mereka ingin menjadikan proyek tersebut sebagai sebuah mesin pencari di internet dengan informasi yang tidak terbatas. Namun, sejarah nama Google berawal dari kesalahpahaman. Ketika Page dan Brin menemukan investor-investor yang dapat mendukung proyek mereka, investor-investor tersebut salah mengeja Googol. Ternyata mereka menulis nama Google di dalam cek. Dengan demikian, akhirnya Page dan Brin tidak jadi menggunakan nama Googol dan menggantinya dengan Google.
Awal dari sejarah nama Google memang dimulai pada tahun 1995. Namun, perkembangan Google mulai meningkat pesat pada tahun 1998. Tepatnya pada bulan Agustus, Andy Bechtolsheim, seornag pendiri Sun, memberikan cek dengan jumlah $100 ribu untuk pengembangan proyek ini. Akhirnya pada bulan September Google mengajukan pembentukan badan hokum dan membuat rekening dengan nama perusahaan.

Pengembang yang Tidak Menguasai HTML

Sampai pada saat ini halaman muka Google sangat sederhana, hanya sebuah logo dan kotak untuk memasukkan kata kunci pencarian. Selain sejarah nama Google yang unik, asal mula tampilan Google yang sederhana juga unik. Sejak awal didirikan, Page dan Brin memang menginginkan tampilan halaman muka Google yang sederhana. Selain itu, sebenarnya kedua pendiri Google tersebut tidak menguasai HTML.

Google Saat Ini

Saat ini Google merupakan mesin pencari yang memiliki ukuran raksasa. Indeks pencarian yang dimiliki oleh Google sebesar lebih dari 100 juta gigabyte. Sebagai perumpamaan, indeks pencarian Google membutuhkan penyimpanan 100 ribu buah hard disk berkapasitas 1 terabyte. Dapat Anda bayangkan bagaimana pesatnya perkembangan Google, sejak sejarah nama Google pertama kali dimulai hingga saat ini.
Sejarah nama Google menjadi perusahaan yang besar telah berlangsung sejak lama. Namun, sejak tahun 2008, mesin pencari perusahaan ini berkembang sangat pesat. Pada tahun 2008, Google telah menemukan satu triliun URL unik. Selang empat tahun, yaitu pada tahun 2012, Google telah menemukan URL unik sebanyak 30 triliun. Dapat Anda bayangkan, dalam selang empat tahun, URL unik yang ditemukan bertambah sebanyak 30 kali lipat.
Pada awal sejarah nama Google, perusahaan ini hanya dikenal dengan produk mesin pencari. Saat ini, selain mesin pencari, Google telah memiliki banyak produk karena keseriusannya dalam mengakuisisi berbagai produk yang potensial. Blogger, YouTube, Mototola Mobility, Android, Google Earth, dan Google Maps merupakan produk-produk yang diakuisisi Google. Saat ini produk-produk tersebut juga telah terbilang sukses. Google juga memotret jalanan dengan menggunakan satelit untuk keperluan fitur Street View pada Google Maps. Jika panjang jalan yang telah dipotret oleh Google ditotal, angka yang diperoleh cukup fantastis, yaitu 5 juta mil atau sepanjang 8.046 km.
Selama 17 tahun sejak 1996 sejarah nama Google berkembang, saat ini Google berhasil menjadi perusahaan yang berada di garis depan. Bahkan di bidang digital, Google telah berhasil menjadi sebuah perusahaan terpenting dan terbesar. Namun, uniknya, perusahaan sebesar Google ternyata masih memiliki kesalahan kode pada halaman muka google.com. Kesalahan kode tersebut masih ada sampai sekarang dan mungkin tidak banyak dari pengguna Google yang mengetahuinya.
Read More → Sejarah Google

Friday, 7 June 2013

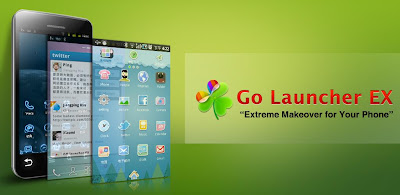
Change Theme Android with GO Launcher EX

cara mengubah tema Android dengan GO Launcher EX 
GO Launcher EX apk
bosan dengan tampilan theme / tema android anda. cobalah launcher thema terbaik untuk hp android anda. silakan download GO Launcher EX apk aplikasi android launcher ini tersedia dengan gratis.
setelah anda instal GO Launcher EX anda dapat menambahkan berbagai theme / tema baru asla masil berbasis go launcher seperti GO Launcher EX Theme Sense. apk, dan masih banyak lagi

sekilas tentang go launcher
Extended version of GO Launcher, one of the most popular home application.
GO Launcher EX is the extended version of GO Launcher, one of the most popular home apps in Android Market. It’s a highly customizable home replacement application, which will run when you press your android phone’s HOME key. 
GO Launcher EX supports hundreds of themes, fast flip speed and tons of useful functions.
Features:
- Hundreds of themes
- Fancy home screen transition
- Smooth scrolling experience
- Icon popup menu
- Folder and task manager in app drawer
- Gesture supported
- Scrollable & resizable widgets supported
Tips: 
1. Pinch fingers to enter preview screen and edit home screen pages
2. Search “go launcher theme” to get themes and select them in “Themes preferences”
3. Set screen transition and flip speed in “Display settings”
4. Long press icons on home screen to active popup menu
5. Long press icons in app drawer to edit location, uninstall apps and create folders
6. If you can't set GO Launcher as your default home, download "Home manager"
Important:
1. This is a totally free application and we need directly call phone numbers permission to enable the direct dial shortcut on home screen.
2. We will bring out some charged apps like themes and widgets, but most of our apps are free!
3. The weather and clock widget in screenshots belongs to GO Weather, one of the applications developed by our team!
4. The other widgets in screenshots are our GOwidgets, try to search and download them in Android Market!
5. Download our “Classic Theme GO Launcher EX” to get the wallpaper!
6. GO Dev team has released GO Launcher EX, GO SMS, GO Weather and GO Contacts. More and more applications are coming soon!
Think of an extreme makeover to your phone? Try this out!

Update Version 3.33

Key Features:
☆ Extremely smooth transition animation
☆ Smooth flipping operation
☆ More than 5000 personalized themes
☆ Amazing custom gestures feature offers you more convenience and fun
☆ Various GO widgets (weather, switcher, calendar…)
☆ Efficient and strong app management function, including sorting, hide app, search, cleaning memory and refresh.

Download Here
Read More → Change Theme Android with GO Launcher EX

Thursday, 6 June 2013

How To Burn CD with Nero

An ISO file is an image of a CD that is ready to burn. You can get ISO files for installation disks (for example) from the internet, burn them to a CD on your computer, then use them just as you would use any other disk.

1. Open Nero 6.
Open Nero 6. 2. Select "CD" or "DVD" from window at top, to match the disk you want to burn
Select "CD" or "DVD" from window at top, to match the disk you want to burn. 
3. Select "Copy and Backup" (second from right at top menu).
Select "Copy and Backup" (second from right at top menu).
4. Select "Burn Image to Disc"
Select "Burn Image to Disc". 
5. "What Recorder?" --Select which CD burner, if you have more than one.
What Recorder?" --Select which CD burner, if you have more than one.6. "What would you like to burn?" Some options on this list can be selected, others not. You want to burn "disk image or saved object," the last choice. You cannot click it. Instead, find your MYDISK.ISO file from the file listings at the left (substitute the name of your .ISO file instead of MYDISK.ISO).
What would you like to burn?"  Some options on this list can be selected, others not.7. Click the .ISO file on the file listings. Browse to another directory, or "Desktop" if needed.
Click the.8. IMAGE RECORDING. Your .ISO file should be listed in the file section at the top. Click BURN to start burning the disk.
 IMAGE RECORDING.
9.NEXT. Click NEXT when the disk is done burning.
NEXT. 


Read More → How To Burn CD with Nero

Wednesday, 5 June 2013

TweetDeck For PC Download

 
TweetDeck is like an onion, the more and more you dabble in it, the more features you uncover and use. Because of this constant discovery, remembering when and how to utilize the variety of Twitter management tools can be a bit disconcerting. If you have forgotten how to use one of the management tools showcased in this Twitter client, however, the help and support options are excellent for quickly recovering needed information.
We love the streamlined design of this Twitter client, and we love the ease of navigation even more. Although there are many tabs and buttons to choose from, they are all logically grouped together in various locations throughout the Twitter desktop client, making everything easy to find and easy to use.
Adding your friends, colleagues and others you follow to groups or lists is a fantastic feature, terrific for organization, and it is a straightforward way to locate information within this Twitter client. At the bottom of every tweet, located next to the posting title, is a little plus sign. By clicking this plus sign, you are directed to the groups/lists window. Simply type the tag for your list (entertainment, food, hobbies, etc.) and move to adding list members. Adding new groups is easy. Moving people to those groups even easier: drag and drop, save list, done.

Features
 
This Twitter client boasts a long list of features that help you stay connected to the world around you with ease.
Columns – Keeping up with friends, trends, fashion news and entertainment can be exhausting, but simply by using the five-column setup within this Twitter client keeps everything organized and easy to manage. If the five-column layout is just too much, you can always delete columns or whittle down the interface to a single panel, the choice is yours.
Trending column – The trending column is a powerful Twitter client tool that can literally take you around the world tracking what is hot and what is not. Users can trend worldwide, or set the trends to specific locations (Seattle, Australia, Sao Paulo, London, etc.) We LOVE this Twitter management feature.
Recommendations – The TweetDeck column is yet another favorite feature in this Twitter client. Depending on what or who you are already following, TweetDeck makes suggestions on who to follow next. This is a great way to network with companies or people you wouldn't have usually sought out on your own, creating networking opportunities you might not even have been aware of.
Located at the bottom of each column, several settings choices are available for that specific column:
Arrow – Shift columns left or right
Cloud – Show what is popular (trending) in each column
Eye – Mark all updates as being seen
Scissors – Clear seen updates
Trash Can – Clear All
Currently, Twitter has a 140-character limit for all tweets. TweetDeck abides by this rule, yes, but it has pushed the boundaries with the option of cross-posting any update to Google Buzz. Type as much as you want; 140 characters will be sent to your Twitter account, and a GoogleBuzz link will also be inserted for those who choose to read on.
If you would like to keep within the traditional Twitter client character limit, however, "TweetShrink" may just become your new best friend. Just as the name implies, this feature takes a tweet with too many characters and shortens it as much as possible. For example, we typed, "Going to see the opera tonight with friends…" As the entire Tweet was too long, TweetShrink helped us along by transforming our well-written sentence to this: "Going 2 C the opera 2nite w/friends…"
You can view photos and videos within your TweetDeck columns, or you can choose to open photo links in a separate web page. The process of uploading pictures with this tool is pretty standard. By accessing the "setting" options, you elect exactly which service you would like to use to upload your images to Twitter. Only one service can be selected at a time, and your options include:
  • TwitPic
  • yfrog
  • Plixi
  • Posterous
  • Mobypicture
Sharing videos is accomplished via TweetDeck's 12seconds.TV. With 12seconds.TV, you share short videos, created using your mobile phone or webcam, with friends, family and the public – all from within this Twitter client.


Download Tweetdeck for PC Here
Read More → TweetDeck For PC Download

LinkWithin

Related Posts Plugin for WordPress, Blogger...